Introduction: Flexify for Google is a versatile tool that seamlessly connects your Shopify store with Google Merchant Center, helping to streamline your product listing process. If you've previously installed the Flexify: Facebook Product Feed app, you’ll be delighted to know that all initial settings are imported into Flexify for Google. However, this doesn’t mean you’re locked into those settings; customization particularly for Google is available. By integrating with your existing Shopify Google and YouTube (app) sales channel, Flexify makes it easy to enhance your product data using advanced features like custom image specifications and automated attribute enhancements. Follow this step-by-step guide to set up your Flexify supplemental feed in Google Merchant Center.
Installation and Initial Setup #
Step 1: Install Flexify for Google
Ensure that the Flexify for Google app is installed on your Shopify store. You can install it directly from the Shopify App Store by visiting this link: Flexify for Google on Shopify.
Note: If you have the Flexify: Facebook Product Feed app already installed, your initial settings will be automatically imported into Flexify for Google. This ensures a smoother transition and quicker setup process.
Step 2: Sync Your Product Feed with Google Merchant Center
- Click on the Settings icon in the top-right corner of your screen and navigate to Add-ons.
- In the Discover section, find Advanced data source management and add it to Your add-ons.
- Close the Add-ons management. You will return to the dashboard, specifically the Overview section.
Adding the Flexify Supplemental Feed #
- Click on the Settings icon again in the top-right corner of your dashboard and navigate to Data sources.
- In the Supplemental sources section, click Add supplemental product data.
- Select Add product data from a file.
- Paste your Flexify feed URL into the Enter a link to your file field.
- In the Edit schedule field, set the update time. We recommend scheduling it a few minutes after the Flexify feed generation in Shopify.
- Leave the authentication fields empty (no username or password required).
- Select the primary data sources and assign your Flexify feed to it by checking the box next to your primary feed (usually named "Content API").
- Click Create data source.
Check Attribute Rules #
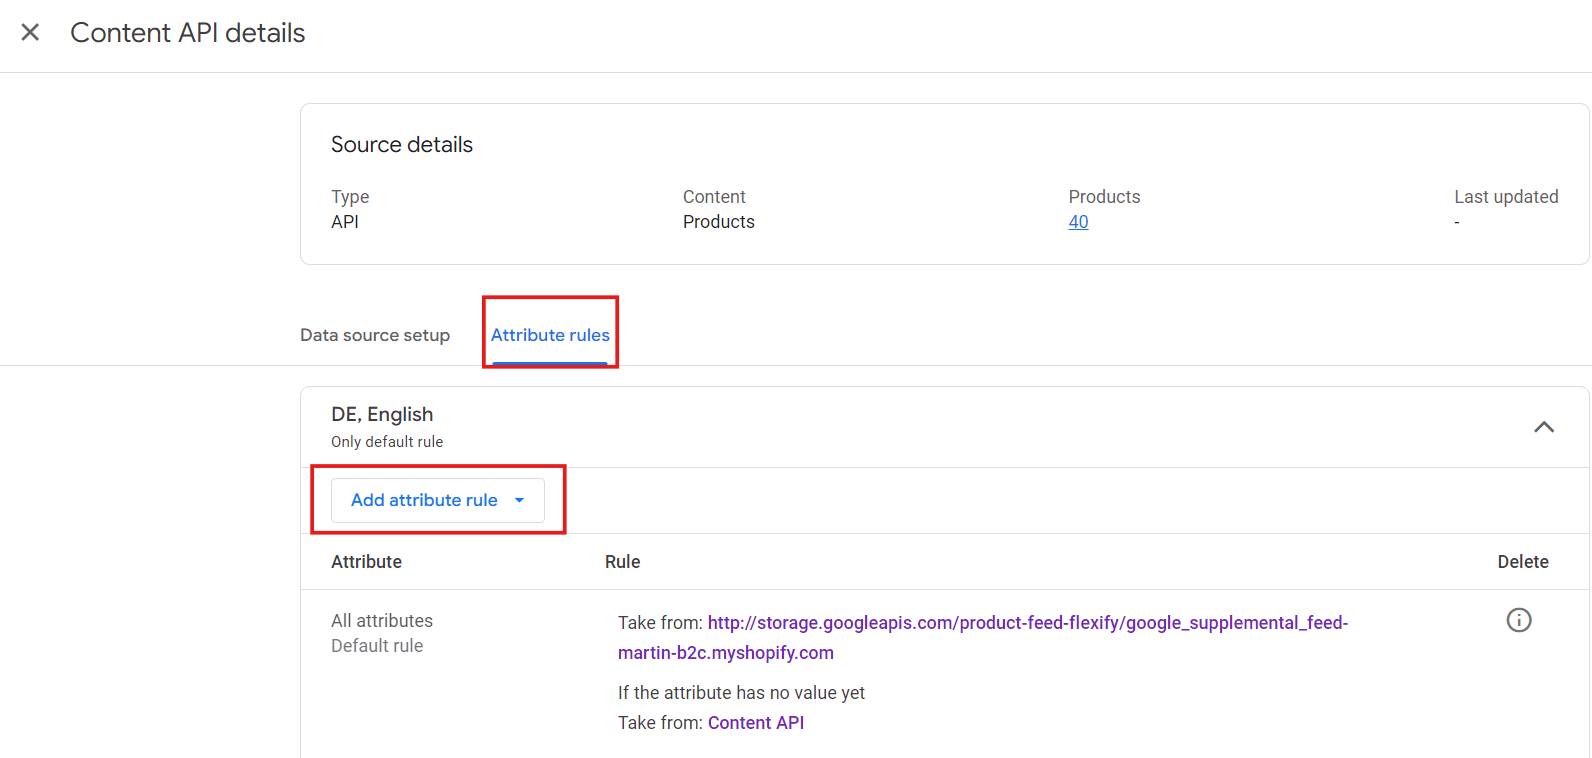
Whenever there is a change in your data sources, it’s essential to review the attribute rules to ensure they remain accurate. The attribute rules for the primary source (Content API) should follow this logic:
- Prioritise Flexify values: For all attributes, prioritise values from the Flexify supplemental feed (e.g.,
https://storage.googleapis.com/product-feed-flexify/google_supplemental_feed). - Fallback to Content API: If an attribute has no value in the Flexify source, use the value from the Content API.
Tip: Keeping these rules intact ensures that your product data is enriched with Flexify while maintaining consistency with your main feed.
Step 3: Customize Settings for Google
While the imported settings provide a solid foundation, you may want to tailor them specifically for Google. To do this:
- Open the Flexify for Google app dashboard in your Shopify admin.
- Click on Settings.
- Customize various options, such as currency conversion, product variants, and more.
- After making adjustments, click Update feed to apply your changes.
Step 4: Monitor and Optimize
Once your product feed is syncing with Google Merchant Center, regularly monitor the performance of your product listings. This will help you identify what’s working and where improvements can be made. Use Google Merchant Center’s reporting tools to track your feed’s impact and make ongoing adjustments as needed.
Conclusion: Flexify for Google is an essential tool for Shopify store owners looking to maximize the visibility and reach of their product listings on Google. By leveraging the app’s features and customizing your settings, you can effectively connect your Shopify store with Google Merchant Center and optimize your product listings for success. Don’t forget that help is just a click away at [email protected] should you need more assistance.

